If you are using a real optical drive and a physical CD you can skip this step.
In this step you'll find or create an image catalog to hold the CD image file and then attach that image catalog to a virtual optical drive.
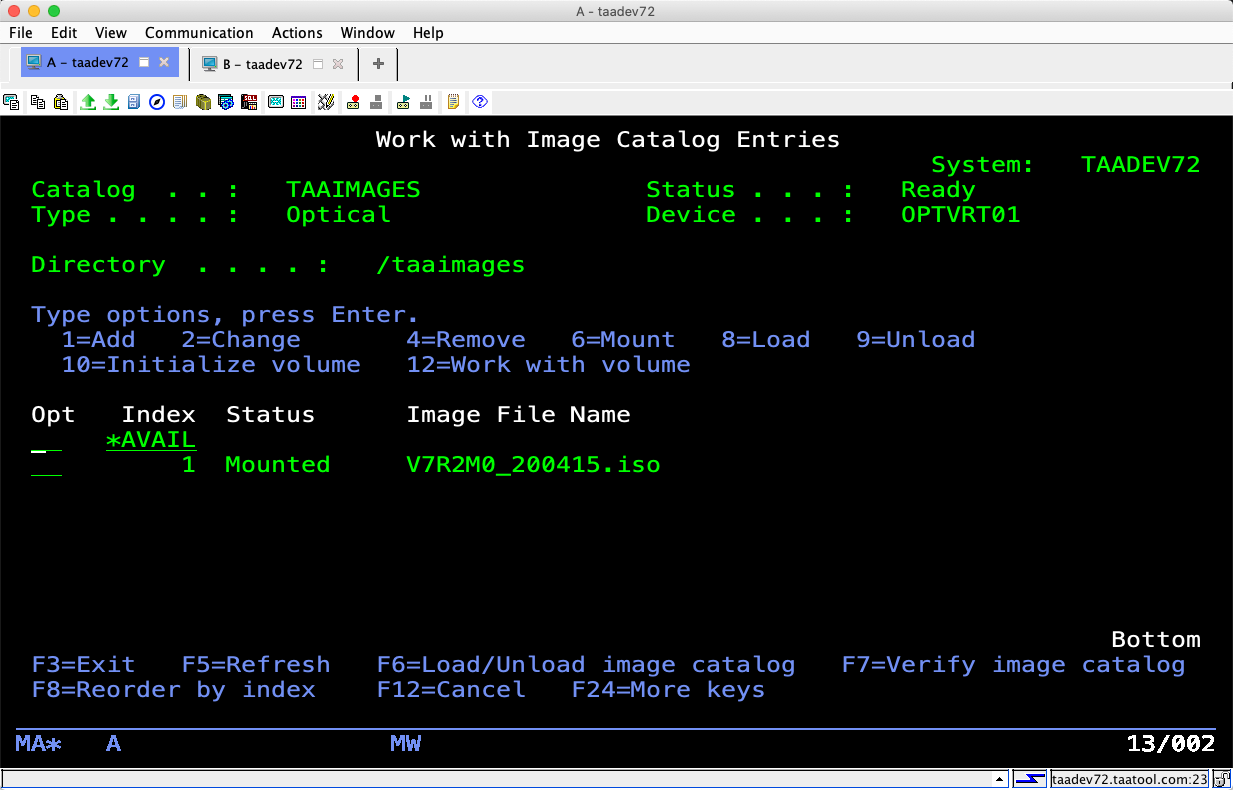
Image catalogs behave like CD changers. They are capable of holding multiple CD or DVD images. You add image catalog entries for each CD image file you want to access. You change to a CD image by mounting it in the image catalog. You then load the image catalog to attach it to a virtual optical drive to access the mounted CD image.
You may already have a TAAIMAGES catalog defined from a previous install. You can continue to use that image catalog for file you just uploaded. You can see if you have a TAAIMAGES catalog using the WRKIMGCLG command.
WRKIMGCLG IMGCLG(TAA*)This will bring up the Work with Image Catalogs screen.
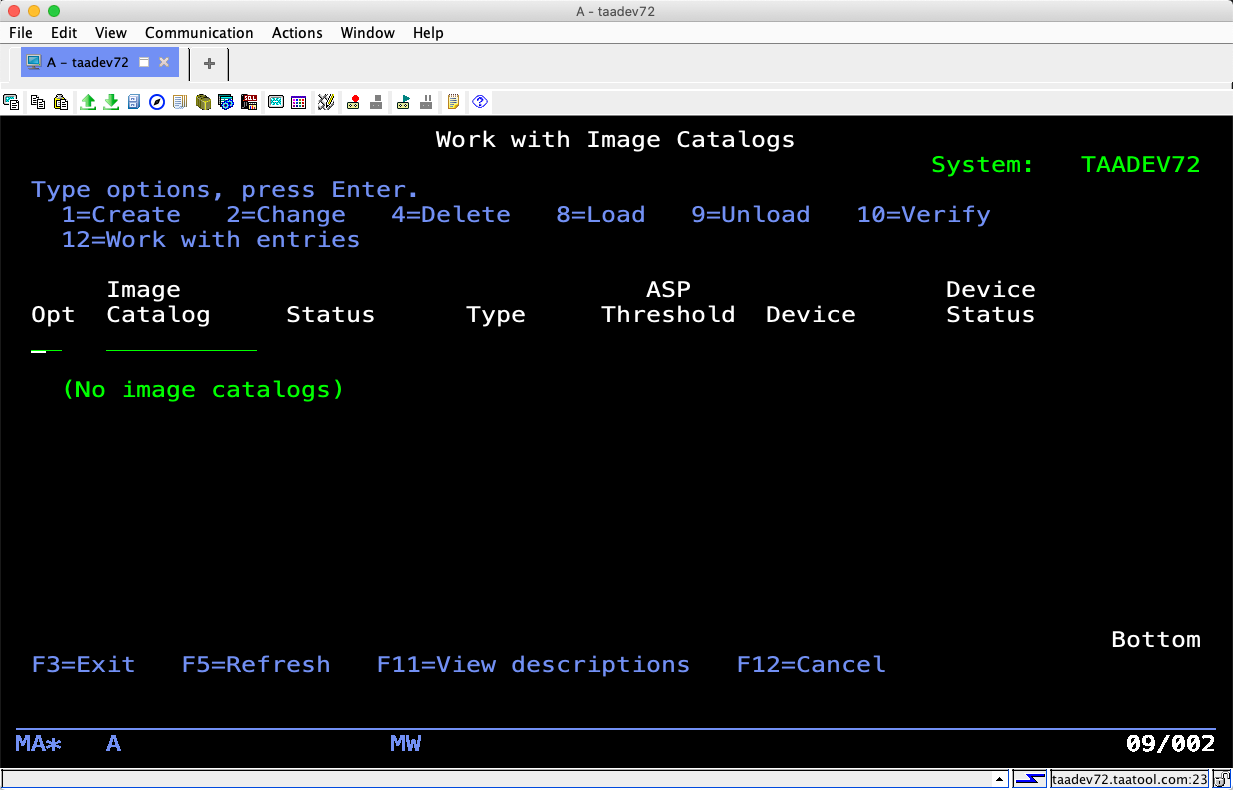
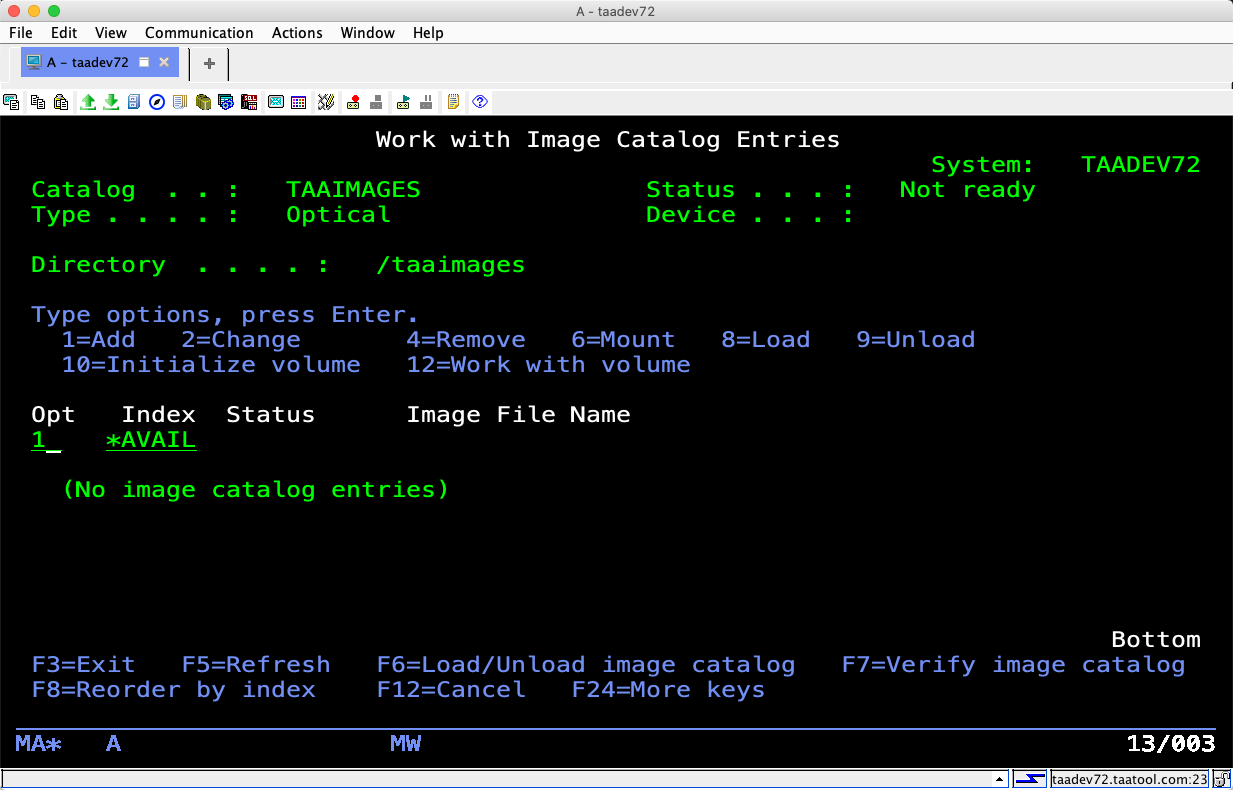
As you can see, there is not a TAAIMAGES catalog defined. If there were you would skip to Add the Uploaded CD image file
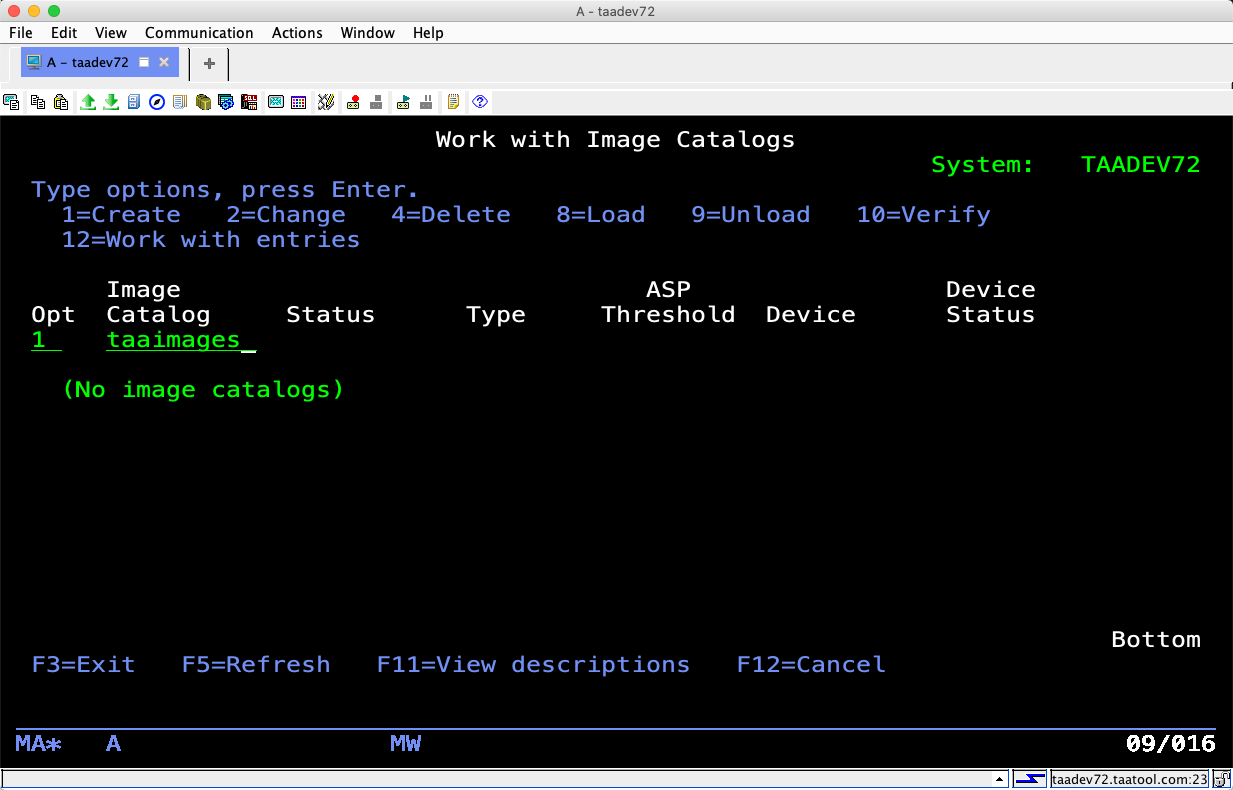
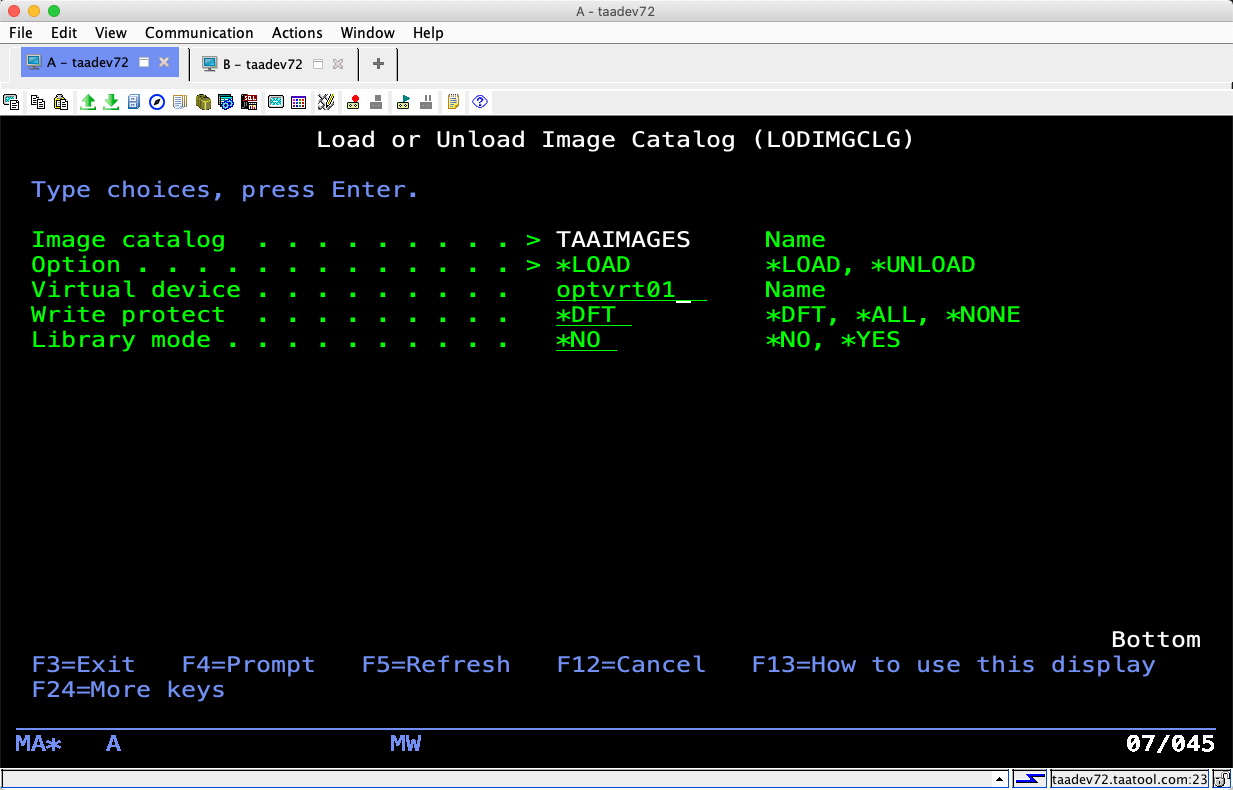
If you need to create a catalog that can be done from this screen. Select option 1 and fill in the catalog name.
Press enter. The following screen will appear.
Fill in the prompts.

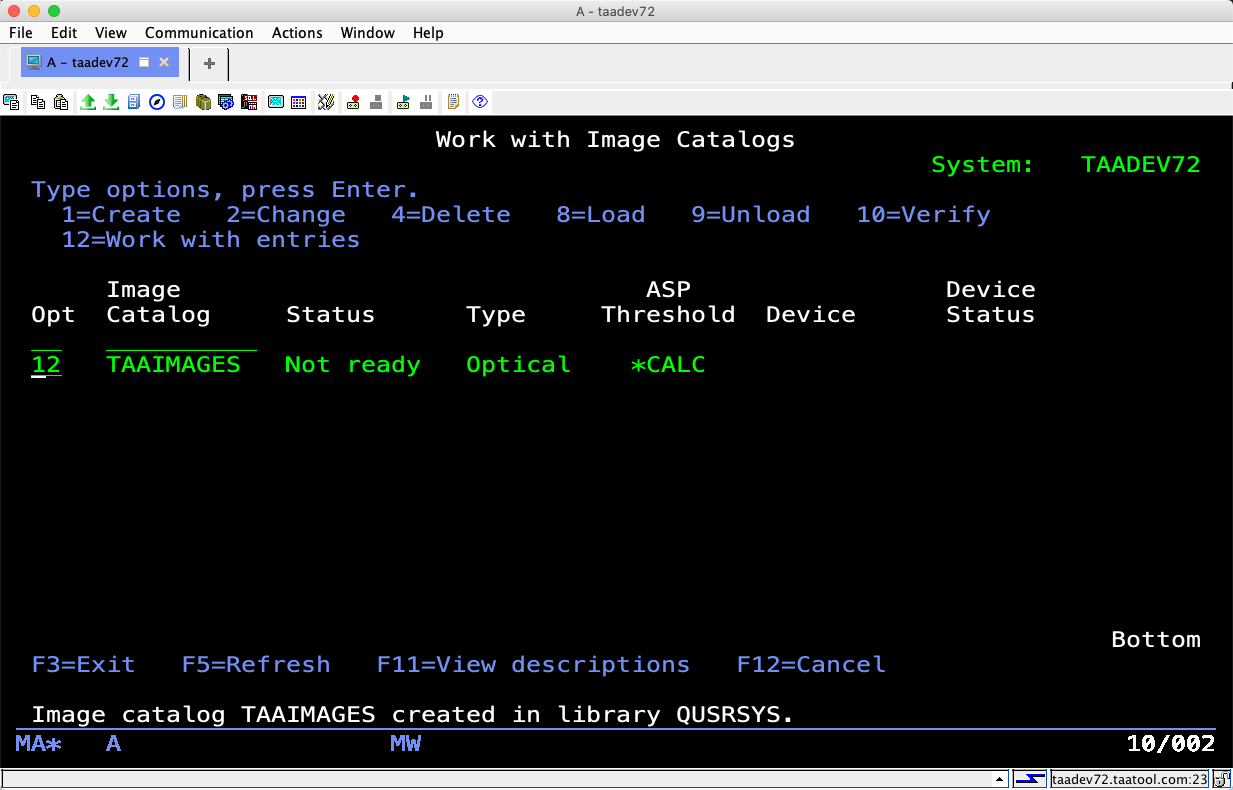
Press enter. The system will create the image catalog and it will appear on the Work with Image Catalogs screen.
Enter option 12 to work with the image catalog entries.
Press enter. The Work with Image Catalog Entries screen appears. Enter a 1 to create a new entry.
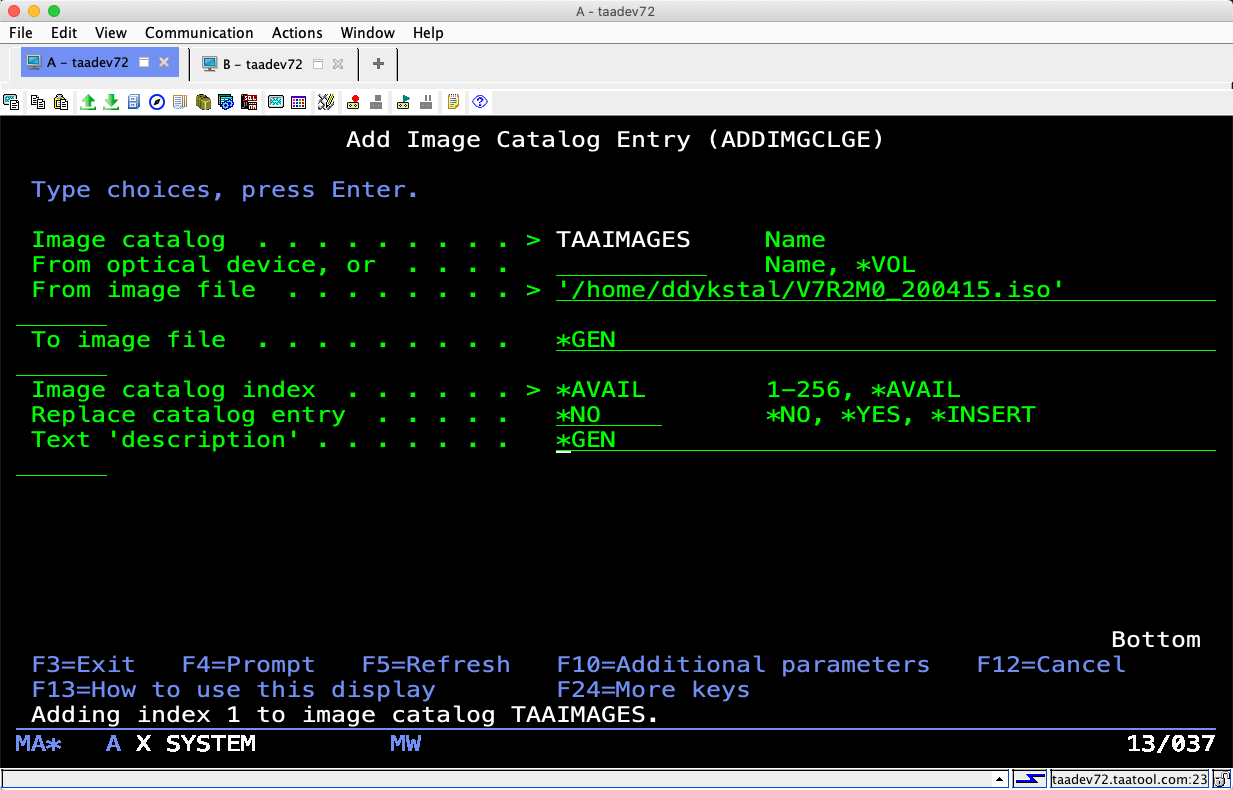
Press enter. The Add Image Catalog Entry prompt appears.
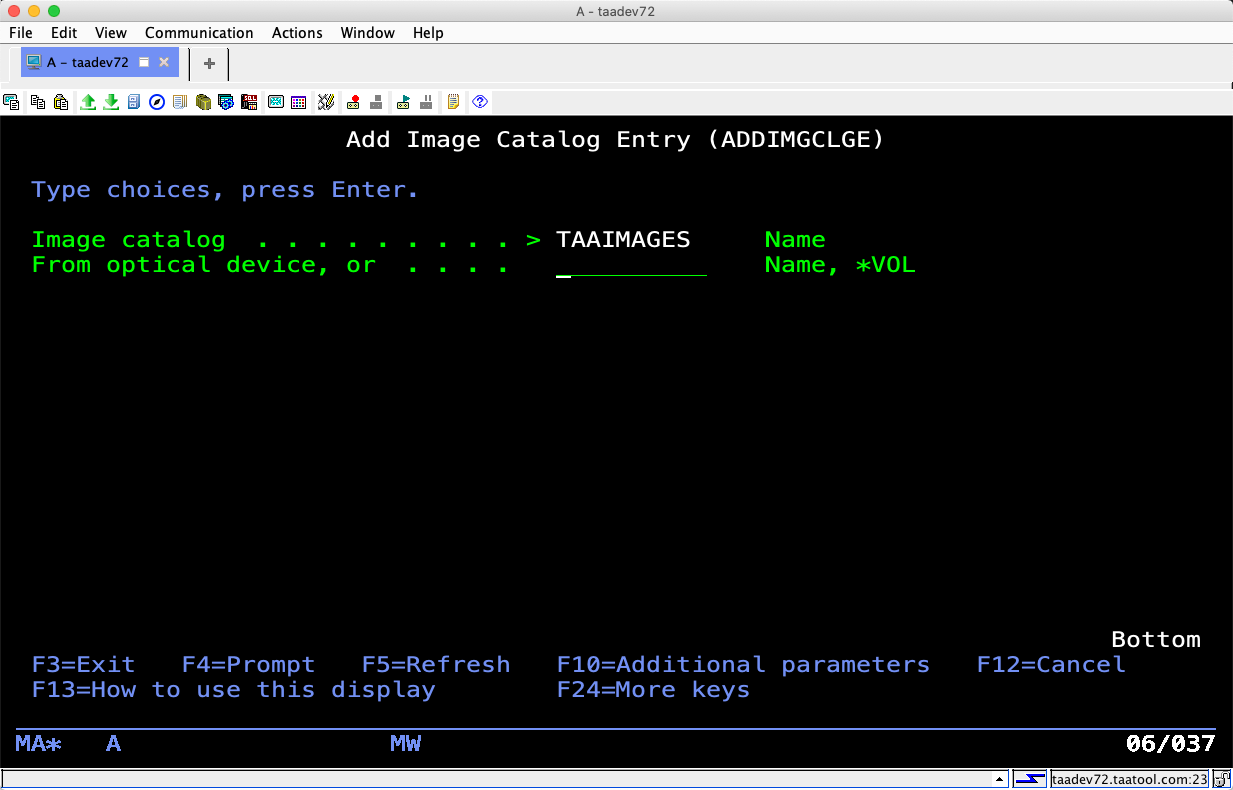
Press enter. More prompts appear. Fill them in using the full path name of the image file you uploaded.
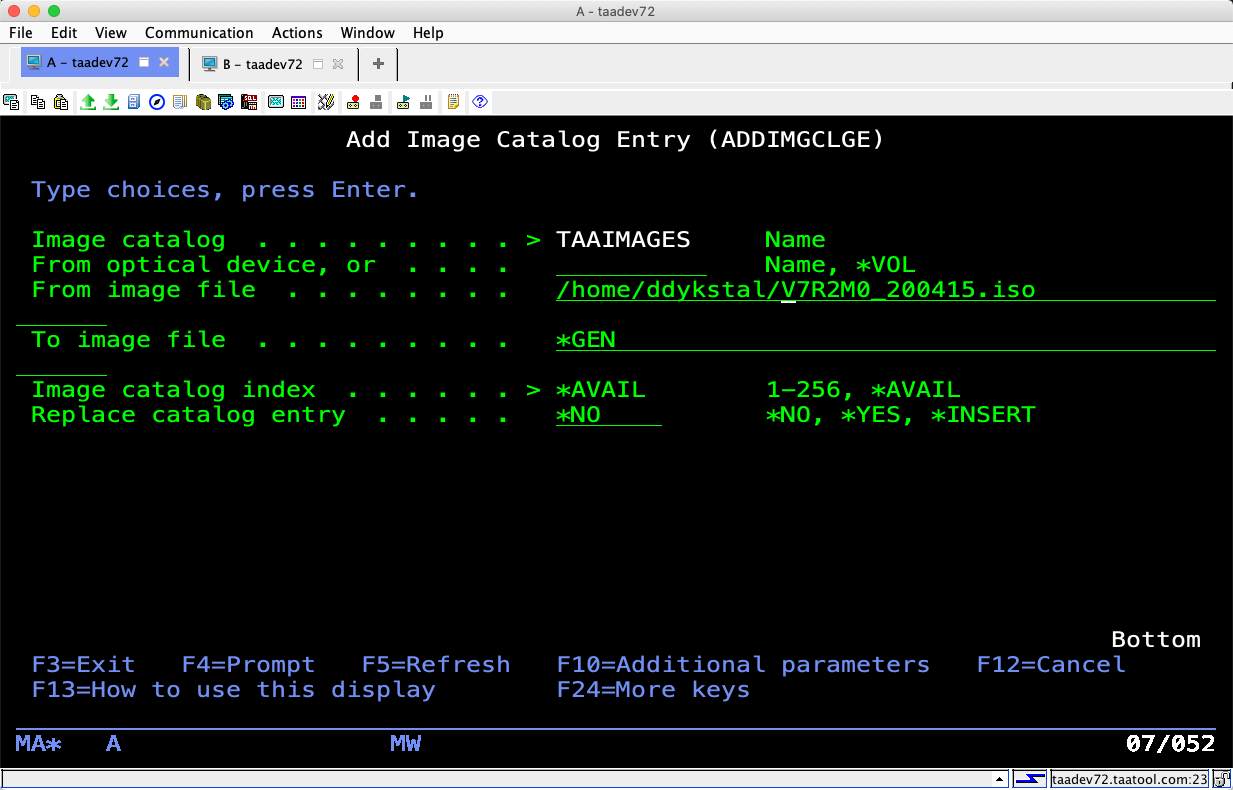
Press enter. The prompter makes some minor adjustments.
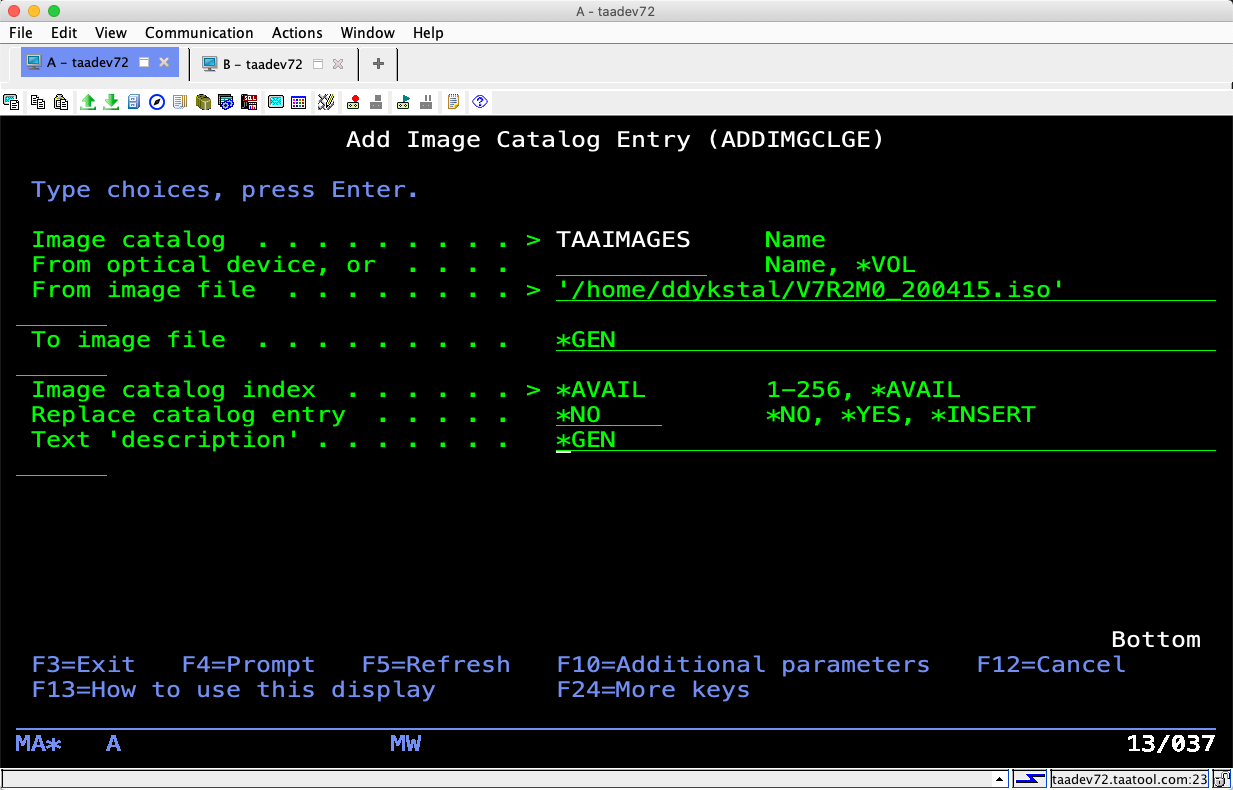
Press enter to add the entry to the image catalog. This will take a few seconds and you will see a progress message.
When it is finished adding the system will display the image catalog entries again. The new entry should be there and be in loaded state.
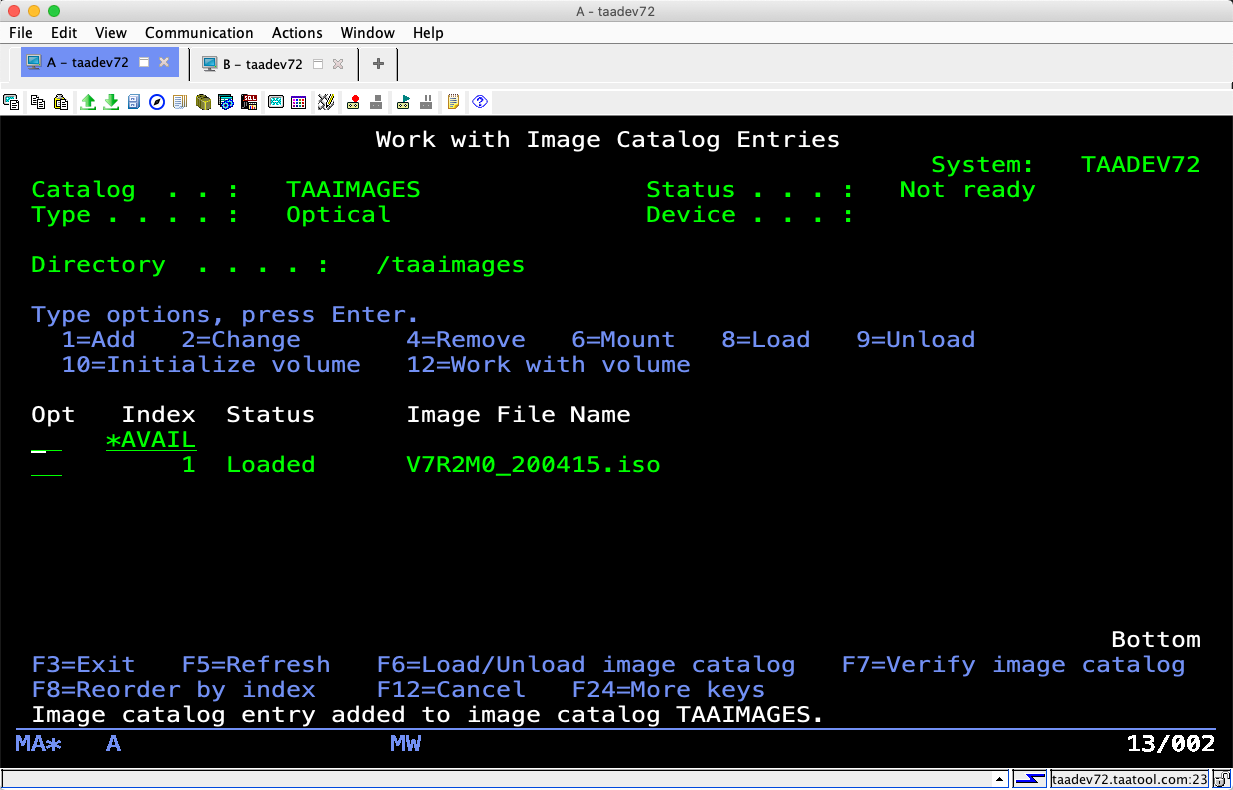
Use option 6 to change it to mounted state.
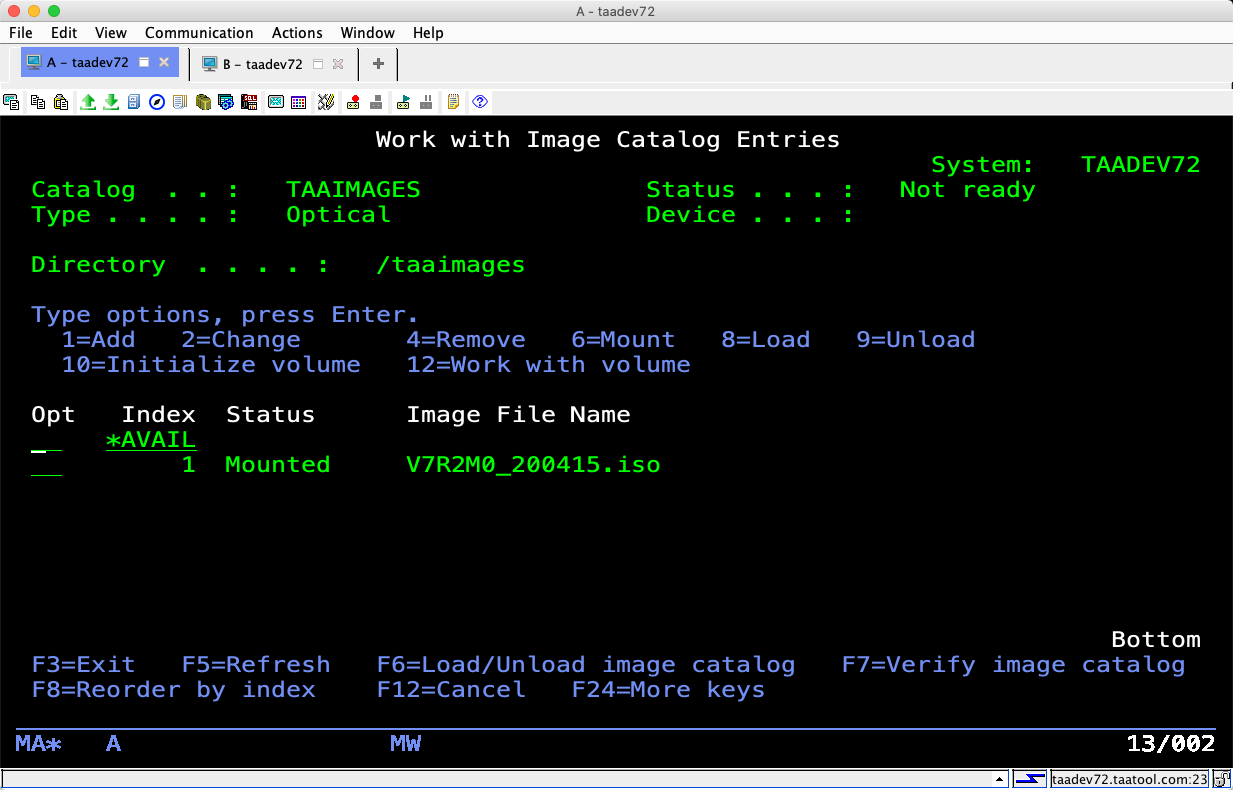
Press F6 to load the image catalog onto the virtual optical drive.
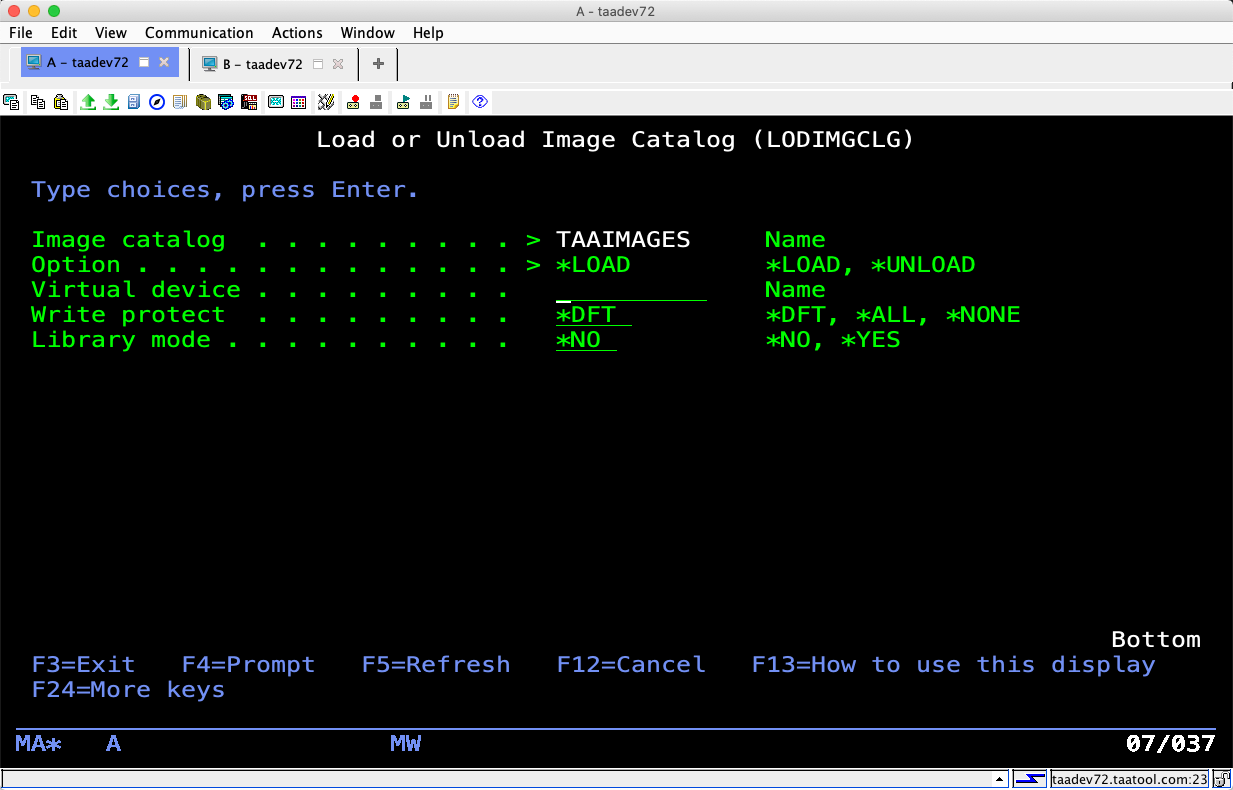
Fill in the virtual optical device name you wish to use.
Press enter. The Work with Image Catalog Entries display is redisplayed and shows the image catalog as ready.